.png?width=180&height=67&name=Crank-AMETEK-HZ-Rev%20(4).png)

A Solution For Testing User Interfaces Developed Using Storyboard - Part 1
The user interface serves as the primary point of interaction between a device and its user, ensuring its reliability and functionality. Rigorous UI testing helps identify potential glitches, responsiveness issues, or design flaws that could compromise the user experience. It is a proactive measure to guarantee that the embedded system meets its technical requirements and delivers a seamless and intuitive interaction for the end user.
Significance of UI Testing
Let's understand this with an example:
A medical industry manufacturer developed a new range of ventilators for patient monitoring and critical care services. The medical UI testing for the product was done using a third-party tool in a limited test environment. Moreover, the tests were conducted separately after the development phase once the project was compiled.
This impacted the project in different ways:
- More iterations between the testing and development phases were required
- The overall time to market was increased due to the repeated process
- The extended duration led to an overall increase in the project's cost
- Testing conducted in a restricted environment may result in the presence of potential bugs in the final product, which could be identified later. This has the potential to impact customer satisfaction, thereby risking harm to the manufacturer's image and reputation
How Integrated Testing Support Could Have Helped Here:
- Conducting touchscreen calibration testing through an integrated framework during the development phase would have identified inaccuracies in touch response in the early stage and hence necessary measures would have been taken to fix the bugs before completing the project
- Rigorous performance testing, including high system loads, would have exposed potential system freezes before the product hit the market
- Verifying the integration of the UI with machine components could have revealed arising issues in the early stage of development, saving on both time and cost
The reported issues led to customer dissatisfaction, warranty claims, and a tarnished reputation for the manufacturer. Subsequently, they had to release software updates early to address the UI problems.
This scenario explains the importance of integrated UI testing in embedded products. Effective automated and integrated UI testing contributes to embedded systems' robustness and quality, decreases the time to market, and fosters user satisfaction and product success in a competitive market.
How Can Validator Help?
Crank has created a UI testing framework - Validator, which comes integrated with the GUI development tool, making testing an easy and integrated part of the development process. This saves a lot of time for the developers as they can catch and fix the bugs in the early stages of development. The primary goal for Validator is to save time; Storyboard developers no longer need to hand code manually and design a framework to test Storyboard user interfaces.
The tool offers user-friendly testing features that integrate Storyboard UI development capabilities, encompassing functions such as event recording, playback, and screen recording.
Validator offers a test recording tool that allows testers to create tests with reusable sequences of actions and test points to perform during playback. Currently, there are two test points: data capture and image capture (screen/rect/fqn). Each of these produces resources known as test artefacts. During a test recording, the artefacts generated by test points are saved as reference artefacts, which represent the 'correct' result of a test point.
Once a test has been created, it can be played back on demand, and test points will generate artefacts that will be compared with the reference artefacts. As an application or test change, reference artefacts may need to be updated to realign the expectations and reality. This can be done using the test result viewer.
All the files for Validator are stored in your Storyboard application project under the tests/directory. The test definitions are stored in a file called tests.sbv, containing all the tests, sequences, and actions used.

Validator Test View
The Validator Test View creates, modifies, and runs tests. The view is located in the lower left of the perspective by default. Here is how it appears by default:
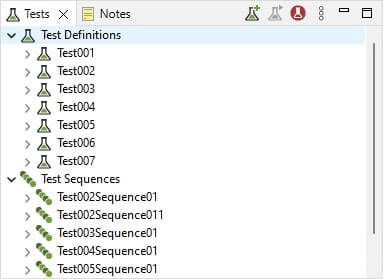
The view is controlled through the three buttons at the upper right of the view. From left to right, the buttons are:
- Add New Validator Test: This button will pop up a dialog to take a name and then create an empty test with that name. Test sequences can then be added to that blank test.
- Run Selected Test(s): This will run the tests that are selected under the Test Definitions tree in the simulator. The results will be stored for comparison against the master results.
- Record A New Test: This will launch the simulator and allow the user to record a series of test sequences and store it as a new test
Validator Test Results View
The Validator Test Results view can be used to compare results from different test runs to the reference results. The view is located in the center of the perspective at the bottom. Here is how it appears:
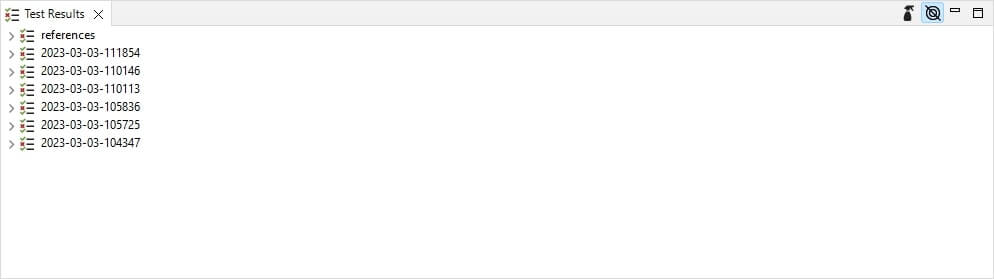
The view contains the references for the tests created in the project. To see a comparison of the test results to the references, double-click on a test run entry in the Test Results view; this will open up the test result editor:
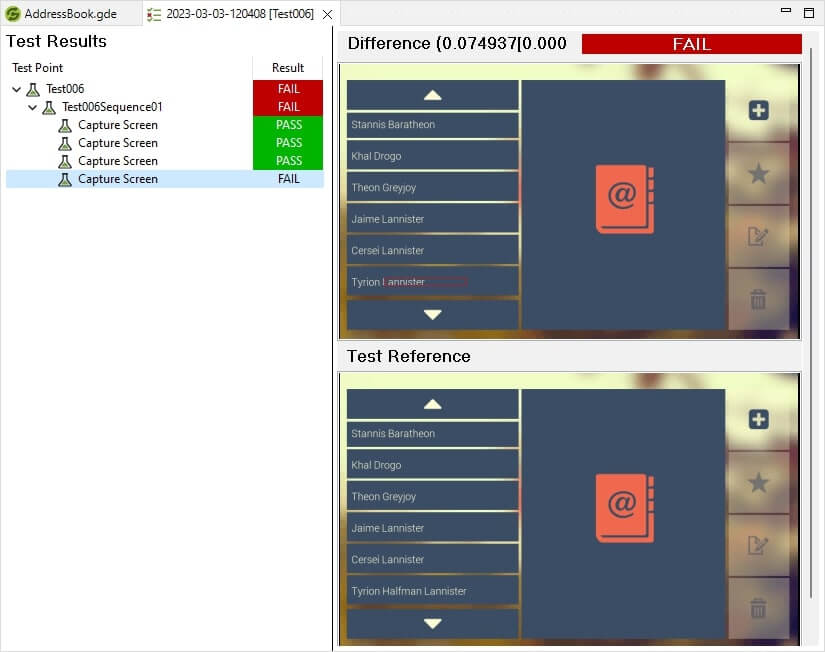
The test result editor will highlight differences between the test result and the test reference. In the case of images, the differences will be highlighted with a red rectangle.
To accept a failed test result as the new acceptable result reference for a test, right-click on the test result and choose update reference result. Results can be updated one at a time or by accepting all failed results as the new reference results.
A test report can be generated for a specific test run to be shared as either a PDF or an HTML file. To create the report, right-click on the test run that should be exported.
Recording Tests Using Validator
When the record new test button is selected from the test view, the test recorder will launch your application with recording enabled. Storyboard Engine will reflect this by showing a red outline around the screen. The control panel dialog can be used to direct the test recording.
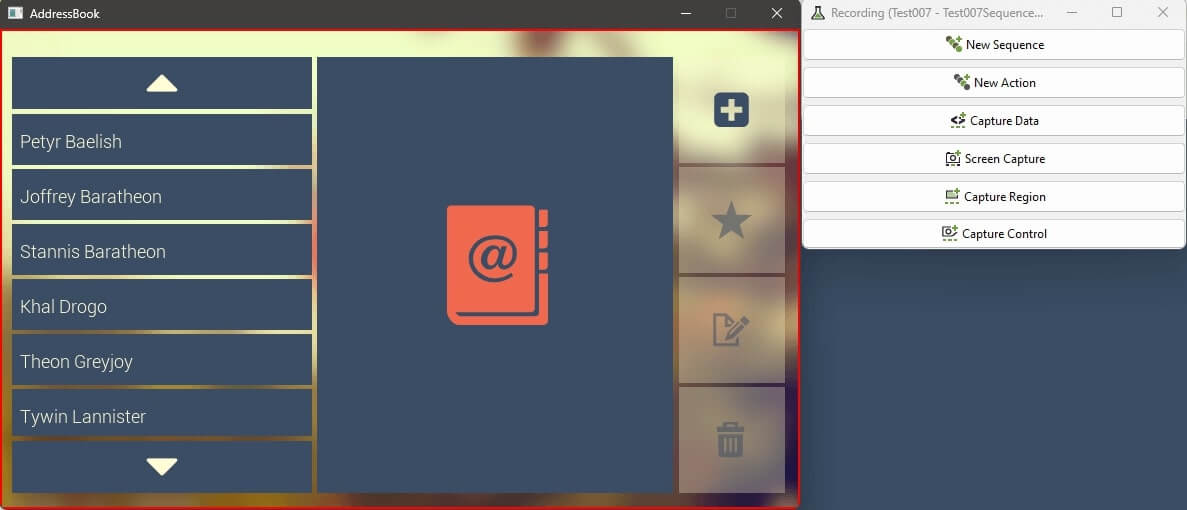
The options in the control dialog are:
- New Sequence: Inserts an existing sequence into the current test or creates a new sequence
- New Action: This command will place a new command in the test
- Capture Data: This option opens a dialog box that lets you capture data stored in variables
- Screen Capture: Generates an image of the whole screen
- Capture Region: Allows the user to select an area of the screen to store as an image
- Capture Control: The user can select a control on the screen to be stored as an image
Playback Tests Using Validator
When the playback test button is selected from the Test View, the application and a playback panel will be launched. The playback panel dialog will show the progress of a test playback, including pass/fail results as they are processed and compared with the test reference results.
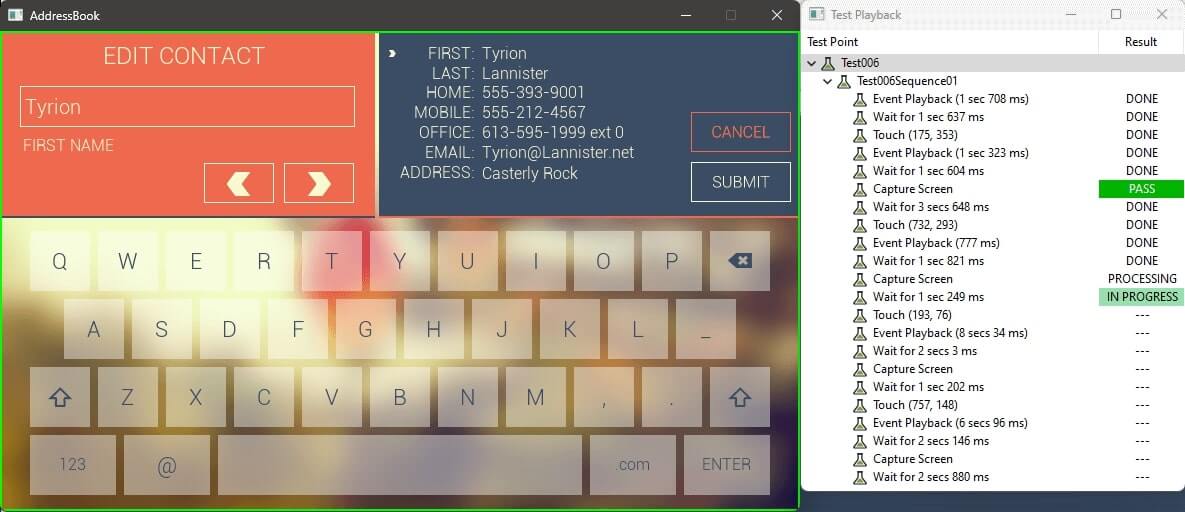
When a test is being recorded, a red outline will be in the window for the application being run. When a test is being played back, there will be a green outline in the window for the application. During playback, the application should not be interacted with when the rectangle is green.
To get more insights into Storyboard Validator features stay tuned for our next blog post.